How To: Make A Custom Motorcycle Seat with Josh Allison
Seats, seats, and more seats! Have to have one on your chop. That's what we're talking about them this month at American Metal Customs. We are covering how to do an integrated mixed metal solo seat! They’re fun to make and with a little creativity, there are endless possibilities on the styles and looks you can give your custom bike! Let's get to it!

The first step is to make a template pattern of what you want it to look like. I start by cutting out my shape with a piece of construction paper.

I fold it down the center, then trim it around the pattern so when you unfold; it's entirely symmetrical on both sides.
Now that I have my shape I transfer it to the sheet metal I'm using. You can use anywhere from 18 gauge steel to 14 for solo seats. In this case, I'm using 18 gauge.

Now that I cut out my seat pan, and I'm ready to put shape into it.

I use my Baileigh Industrial English Wheel, and I wheel in the center of the seat to stretch the metal and get a nice curve in the seat pan. You can also use a slip roller and achieve the same look.

Next, I lay out a bead around the pan. In this case, I'm going to do a ¼ bead all the way around the seat. This looks nice and gives the seat a little more strength.

You can see how I have a nice saddle to the seat, my beads all symmetrically laid out and I'm ready to bead!

I have paced the seat in the Baileigh bead roller with a ¼ bead seat up, and I'm about ready.

I use the tape as a tracking line to follow. When bead rolling try to do a continuous bead all the way around the seat without stopping and no big moments.

You can see a nice even bead all the way around the seat in this pic. Now..this is an extra step I like to do, but you DO NOT have to do this step! If you don't have a bead roller its ok, you will be able to see in later pics the pan doesn't have a bead around it.

Now it's time to make a bottom seat support. It looks cool and makes it so that the seat won't lose its shape and will not have flex in it. Once again I make a pattern from construction paper.

I cut out my pattern on ⅛” steel for its strong support.

I put a little flare on mine, with some shape to it and some holes. This support can look however you want it to! I then TIG weld it to the bottom of the seat pan.

Now it's time to put the mounts on the seat pan. This will vary on the application of how its mounted to the frame. In this case, the front is a through-bolt so the seat can move. I weld the tab to the front of the seat.

Next, I weld the rear mounts on the pan. In this case, there are rear spring mounts that the seat will aluminum to. These spring weld-on tabs came from Lowbrow Customs. As you can see in this pic, there is no outside bead..once again it's an optional step.

The seat pan now has the right shape, bottom support for strength, all mounting tabs are welded on and its ready for the fun stuff! I'm now ready for the top layer of brass. In this pic you can see I have made some designs on the seat I was thinking about. You can do this as well to get a visual of what the seat will look like. In this case, I changed it up a little for the final.

I make another top pattern of the seat. I will use this as a template for the brass top piece.

I have cut my top piece of brass out leaving it a ¼” bigger than my pan for wrap-around tabs. I've also bead rolled my pattern that I liked using the same bead rolling technique I talked about earlier in the article. I also made a pattern so that you can see the leather I'm going to use.

Now I make a pattern of them and transfer it to the other side so that they are the same on both sides. I also laid out the holes for the rivets that will hold it together.

This is how my brass looks after the cutouts and holes.

I can now put the brass on the seat pan and mark the holes for the rivets that will hold it together.

I make sure that the holes in the seat pan don't interfere with any of the seat mount hardware or the support.

Now I can clecos the seat together and make sure of fitment. The clecos will also help hold it together when riveting the seat together.

Next, I cut out the wrap-around tabs with the extra material that I left on the brass top piece. Then I put a medium polish on the brass and its ready to be put on.

I'm ready to cut my leather out. It's the same size as the seat pan and will go under the brass hold down. I mark the holes on the leather where the rivets will go through.

Now I use a leather punch and knock out the holes in the leather.

Next, it's time to assemble the seat! I paint the bottom of the seat pan, glue the leather to the pan, then cleco the brass to the seat pan. By taking out one cleco at a time, I replace it with an aluminum rivet until the seat is all together. Be cafe not to damage the brass! Its very soft and marks easily! Start with a low setting on your rivet gun! I always do some practice ones on some scrap pieces.

I carefully bend the hold-down tabs around the seat. I do this with flat pliers with tape on them to start the tabs. Then I use a rubber mallet to get them all the way around.

There it is! The seat is all together and ready to run! Remember to be creative, and the possibilities are endless!


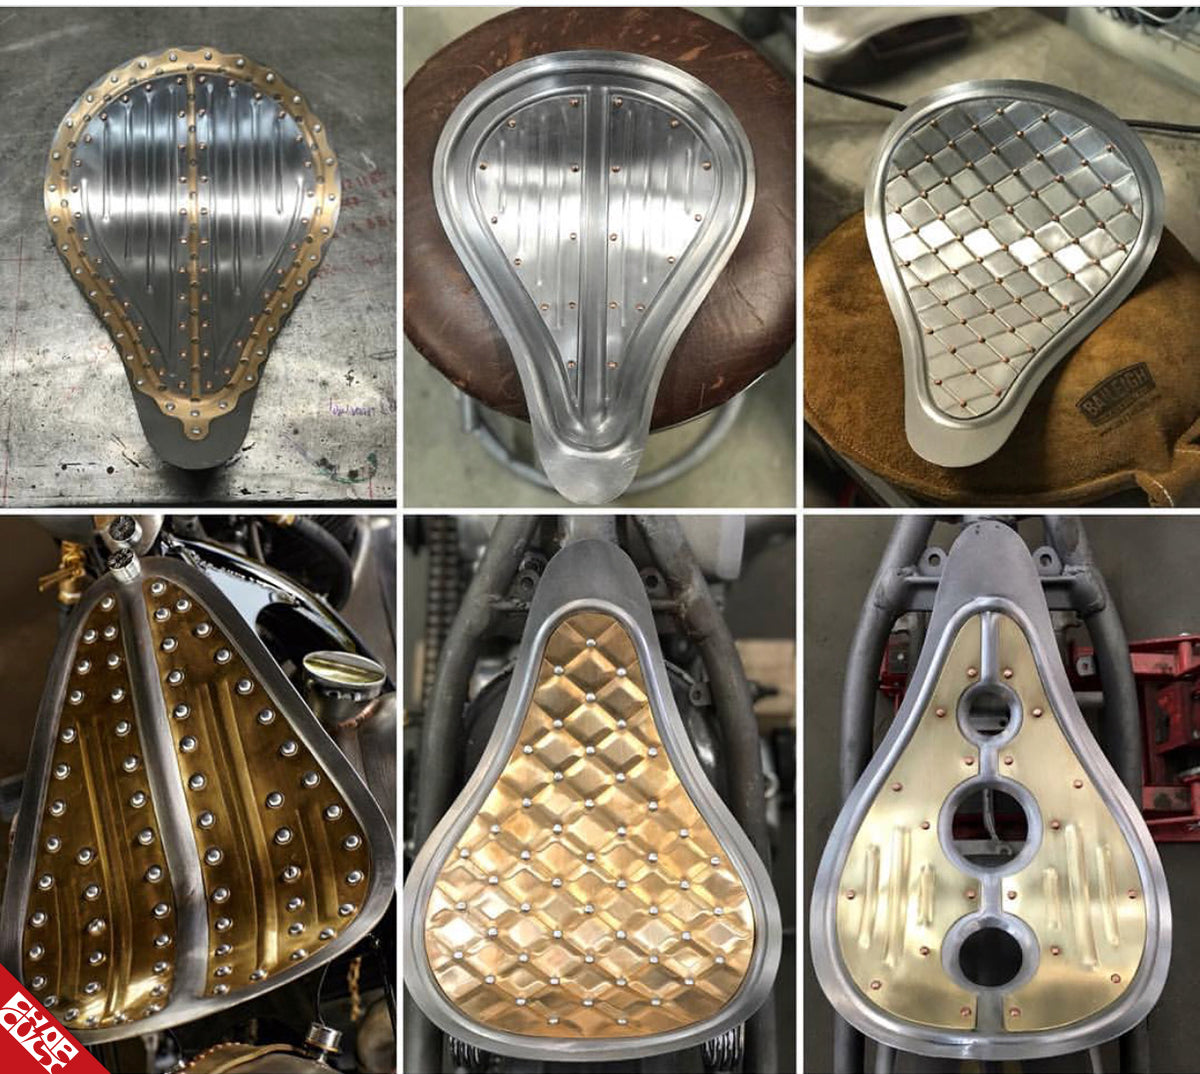
More seats by American Metal Customs using the same techniques as the one shown!

Thanks, everyone! Now go build!!!!
Cheers,
Follow Josh: Instagram / Facebook
Check out American Metal Customs:Website / Facebook / Instagram

Leave a comment